What will make, that the portrait will be realistic?
There is no advice, thanks to which – as soon as you start using them – Your drawings will become photorealistic, and you will turn into a portrait master. However, I do, that part of the people, by undertaking to draw, do not realize, that there are several basics, which can help them spread their wings in their pursuit of realism. Below are some tips, which may be useful:
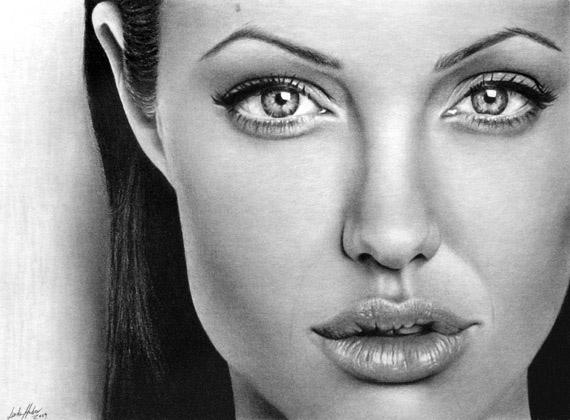
#1 Suitable photo.
Basic rules for drawing from photos:
– the photo must be big, clear, she must not be too pale, be too dark
– details such as the eyelashes must be visible,
– for beginners, I recommend that you start with portraits first in front, that is, the face turned to the front. They are the easiest to draw. The face is then symmetrical, it can be divided in half – wszystko z lewej strony ma swój identyczny odpowiednik z prawej.
– more about the selection of photos here.
#2 Similarity.
Do you portray a famous person, or unknown, similarity plays an important role. The more the facial features, the shape of the eyes, ust, nose will be different from the original photo, the smaller it will be. You don't need to draw your hair exactly like this, in which they are arranged in the photo. Two Italian in this one, or that, one more strand of hair… it does not affect the similarity. Zaś, as I mentioned before, the shape of the eyes, ust, nose and face ma, and it's the biggest. You should take care, among others. o:
– lip thickness – note, whether they are of the same thickness, or maybe the upper lip is narrower?
– mouth width – are they small, or half a face like the Joker? 😉
– the shape of the eyes – whether the outer corners are sagging, whether they are rising; are they big, czy małe, whether the eyelids are large, falling on the eyeball
– lashes – their number is important, length, thickness [thin lines or thick lines?], arrangement. Of course, that's not the point, so that you count the number of eyelashes, he measured the distance between each of them or measured the angle at which they were arranged, but pay attention, if there are many, are they rare, are they long, or short. It's about their overall appearance!
– nose – take a look, what is its length from root to tip, whether it is humpbacked, or simple, wide or narrow; pay attention to the size and width of the nostrils
– face shape, its features – what is the face of the person in the photo? Or is it a round face?, long, triangular, or square?
– cheekbones – note, can you see them in the photo.
– special characters – does the person portrayed have any moles on their face??
– wrinkles – capture the most visible wrinkles in the portrait. It is not about their exact number, but mark the most visible ones on the face.
– mustache – rate, whether the mustache is long, short, whether the hair that forms it is light, or dark, whether they are thick, or thin, at what angle they are arranged, are they tangled, that the hair in the mustache fits smoothly against each other.
– facial hair – note, or is it stubble, or rather a beard like that of St.. Santa Claus 😉 All facial hairs are cut at the same time when shaving, so they grow evenly. Remember, so as not to draw a single longer hair, the second shorter. Of course, it's not about measuring the length of each line you draw with a ruler, but I guess you can tell by eye, czy są podobnej długości 🙂
#3 Details.
Take care of the details, even the smallest details. You see in the picture, that a certain number the eyelashes are arranged around the eye from a specific angle, w taki, and no other way? Hold on to it. The more skilled you will be at drawing, the more you can afford to improvise, if you feel like it 😉
* As I wrote in #2, remember, that I do not order, that you measure the position of the eyelashes in relation to the eye with a protractor, nor that you should count them to one. You just need to pay attention to their total number – if there are a lot of them, or little, and angle – if they are very elevated relative to the eye – you have to draw them like that.
#4 Gear.
Good pencils or crayons are half the battle. Their quality will translate into the final effect. An important role is also played in the case of pencils by their range. Do not use only one pencil for portrait. You must use at least 2 ołówków, hard and soft graphite – at least in my opinion. I personally use Koh-i-noor products, F to 6B.
#5 Patience.
Lack of haste will contribute to an increase in 'visual quality'’ rysunku. The more time you devote to it, the more focused you are and the more attention you pay to each line you put, the better the effect you will achieve. Dawniej poświęcenie 4h na jeden portret było ponad moje siły. However, over time, I started to extend the time of portraying, caressing every inch of the paper, I was in no rush. Now my portraits take me up to 30 hours.
#6 Shading technique
All about it here: How to shade and how not to shade?.
Of course, these are just general rules, which you can, but there's no need to hold on. They may function differently for everyone. I wrote, which I found helpful, at least for me. At the beginning, it took me only 1 hour to draw a portrait. I drew from photos, whatever I could get my hands on, regardless of their quality. I used one pencil, HB. I tried to take care of the similarity, but only general. With each subsequent portrait, this began to change: I started using different pencils, I devoted more and more time to one drawing, I began to take care of the smallest details. I still stick to the above-mentioned principles 🙂